

I first saw the teacup pincushion from a Lion Brand free
pattern, but I didn’t like the shape, so I altered the pattern to make it my
own. I kept the teabag idea, again altering just enough, and I’d like to share
it with you here.
But I so love to have a cookie when I’m sipping my tea, so I
came up with the cookie needlecase pattern. Wanna see how I did it?
First, the cookie:

Make two circles. I used a biscuit-coloured DK yarn and 4mm
hook. You will also need matching felt, a dark brown felt for the chocolate
chips, and thread or embroidery floss to stitch on the inside of the
needlecase.
UK terms used here. This pattern works in a continuous
round, so find a stitch marker so you don’t lose track...
Chain 2
Round 1: Work 6dc into first ch
Round 2: 2dc into each st around (12st)
Round 3: *2dc in next st, 1dc in next st; repeat from *
around (18st)
Round 4: *2dc in next st, 2dc; repeat from * around (24st)
Round 5: *2dc in next st, 3dc; repeat from * around (30st)
Round 6: *2dc in next st, 4dc; repeat from * around (36st)
Round 7: *2dc in next st, 5dc; repeat from * around (42st)
Fasten off and weave in ends.

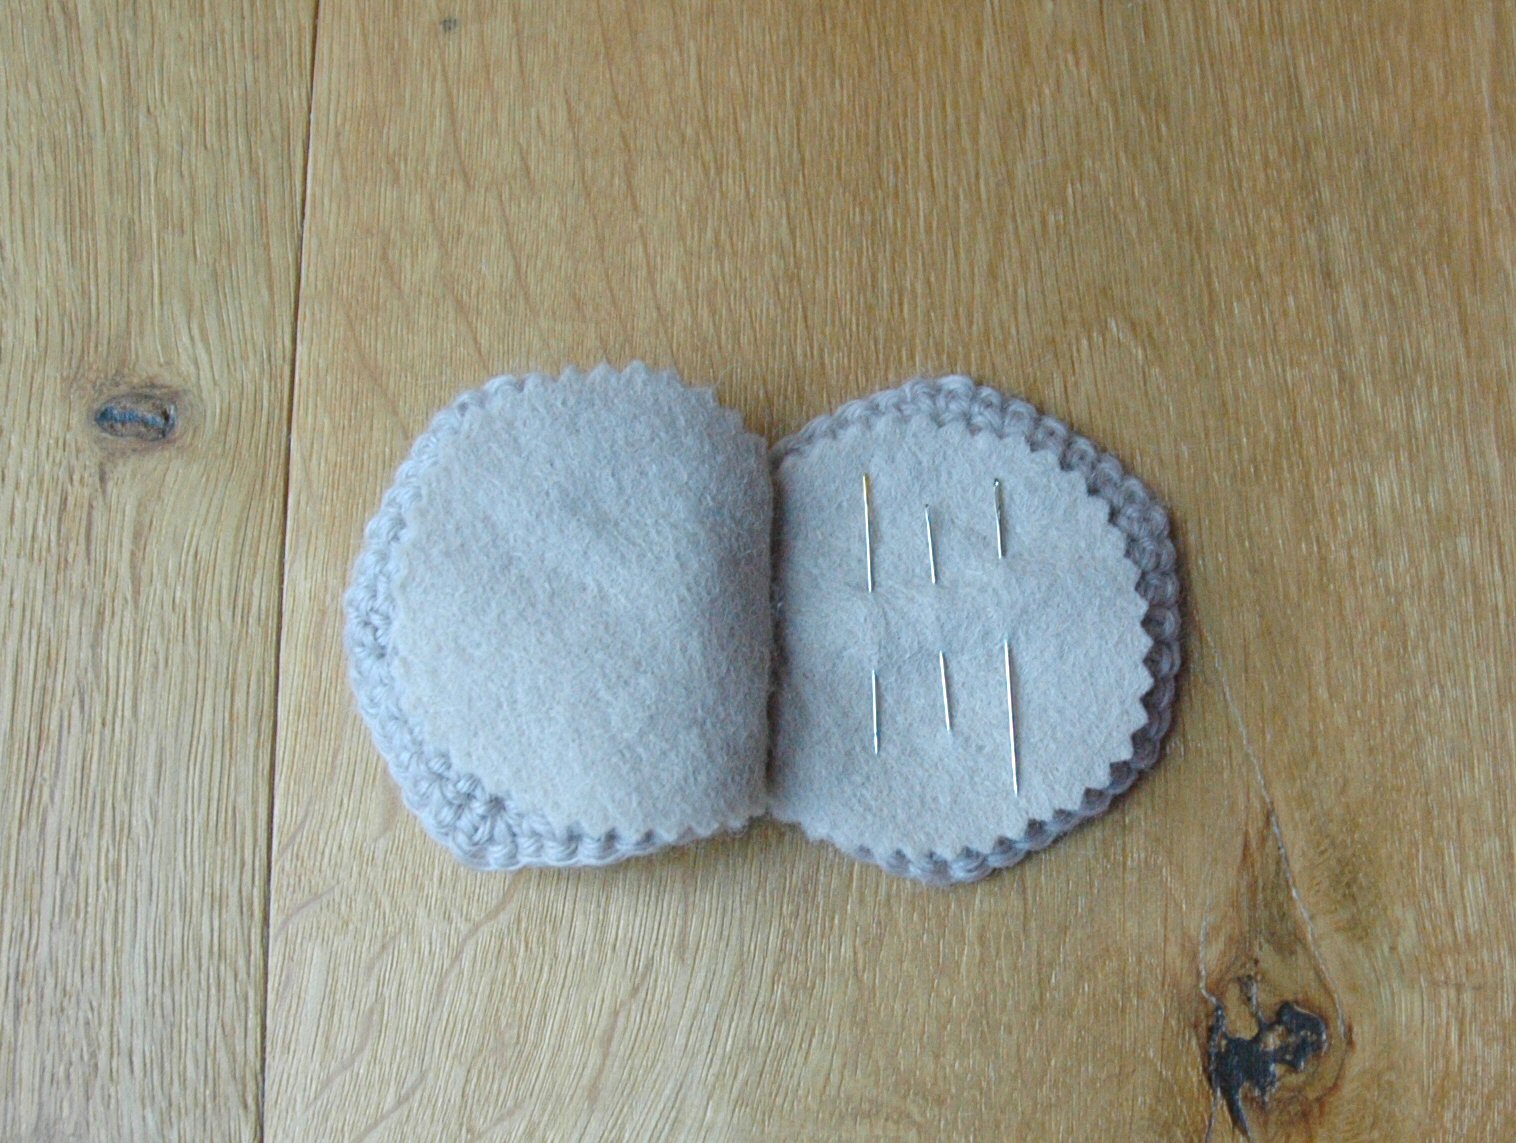
Next, fold the felt in half, and draw on a circle that
measures just a bit smaller than your cookie circles (I used an old magnetic
pin holder, which was just the right size – see in the photo below). Draw the
circle so that one edge is on the fold – this will be the join of the two
cookie halves.

Cut around the felt, leaving the folded edge. I used pinking shears for a zigzag edging.

Stitch the two cookie halves together with a length of the
yarn, then open the needlecase and stitch on the felt with thread.
Finally, use a hole punch to cut wee chocolate chip circles
out of the dark brown felt. I found that gluing them on was the easiest method.Now, the cup of tea to go with that cookie:

Here you need a DK yarn for the cup, a tiny bit of
tea-coloured yarn, an even teenier bit of white for the teabag, some pellets
for the base of the pincushion to keep it steady, and some toy stuffing to fill
the rest.
For the teacup:With the cup yarn, ch2
Round 1: Work 6dc into first ch. Place a stitch marker in the
first st from here on...
Round 2: 2dc into each st around (12st)
Round 3: *2dc in next st, 1dc in next st; repeat from *
around (18st)
Round 4: Working in the back loops only (BLO), dc in each st
around (18st)
Round 5: dc in each st around (18st)
Round 6: *2dc in next st, 2dc; repeat from * around (24st)
Round 7: dc in each st around (24st)
Round 8: *2dc in next st, 3dc; repeat from * around (30st)
Round 9: *2dc in next st, 4dc; repeat from * around (36st)
Rnds 10-14: dc in each st around
Fasten off and weave in ends.
Teacup handle:
This is a bit fiddly because you’re working in a tiny
circle. Have patience, it will all be over very quickly!
With the cup yarn, ch2
Round 1: Work 4dc in the first ch
Round 2: dc in each st around (4st)
Continue repeating Round 2 until the handle measures about
5cm/2in long. Fasten off, but leave a long end for sewing the handle to the
cup.
Tea:
Here I like to start with a magic ring because I don’t like
a small hole in the top of the pincushion showing the stuffing beneath. But if
you find magic rings too tricky, don’t worry, simply ch2 and work the first 6dc
in the first ch.
Round 1: With the tea yarn, work 6dc into a magic ring
Round 2: 2dc into each st around (12st)
Round 3: *2dc in next st, 1dc in next st; repeat from *
around (18st)
Round 4: *2dc in next st, 2dc; repeat from * around (24st)
Round 5: *2dc in next st, 3dc; repeat from * around (30st)
Round 6: *2dc in next st, 4dc; repeat from * around (36st)
Fasten off and weave in ends.
Here’s what you should have
Oh wait, we need the wee tea bag!

With the white yarn, ch5
Row 1: dc in second ch from hook and in each st across (4st)
Rows 2 & 3: Ch 1, turn, 4dc (4st)
Row 4: Ch1, turn, dc2tog twice (2st)
Fasten off, leave a long tail, then hook that tail and bring
it up through the middle of the top of the teabag to stitch into the cup.
Assembling the cup:
Fill the base of the teacup with pellets of some sort – I used
baking beans.

Fill the rest with toy stuffing, then top with the tea lid.
Use the tea-coloured yarn to stitch the tea to the inside rim of the cup.
Stitch the handle to the side. Finally, leaving the teabag hanging down a bit,
stitch it to the top inside of the cup.

All this explaining has left me a bit peckish. I think I’ll
go make a proper version of this tea n’ biscuit...
Any questions, comments or concerns, please don’t hesitate
to email me! Happy crafting!
Chrissie x
Wow you are clever. So much patience to write down and photograph the progress. Thank you for sharing.
ReplyDeleteWhat a sweet little teacup pincushion - a lovely idea, thank you for sharing
ReplyDeleteAngie x
Fantastic! I adore that little teacup. You are very very talented! Thank you for sharing your lovely tutorial.
ReplyDeleteM x
So sweet!! Love the teabag detail xx
ReplyDeletelove the teacup!!!
ReplyDeletei´ll be back!
greetings from hamburg, germany
pami
Thanks Pami, and welcome! Cx
Delete